


 |
| Finished bread with an awesome crust |
from something that looks a bit like the primeval soup and that admittedly does not have the most appealing smell into something that looks so delicious, smells so wonderful and tastes so awesome, my first sourdough bread. I already wrote about the advantage of a healthy self made bread in my blog post about how I was making the sourdough over here.
First of all I needed a recipe. I found a good one on this forum but while they made their bread completely in the bread baking machine, I wanted to have something better, something that is much more like the good stuff that i can buy in a professional bread shop. And let's be honest, while the bread baking machine is something very convenient for a lazy guy like me, baking the bread in the oven is making the bread so much better, giving it a nice crust for a great crunchiness, the texture inside will be so much better. In the end, I still used the bread baking machine for mixing the ingredients but more about that one later. Anyway, the recipe looked like something that I could do with the things I had at home, a few changes here and there and finally this is the recipe that I was preparing now:
Ingredients:
- 500 g of the sourdough that i made a few days ago
- 250 ml warm water
- 1table spoon of salt
- 400 g wheat flour
- 200 g rye flour
- 1 teaspoon of ground cumming1 teaspoon of ground anise seeds
- 2 table spoons olive oil
- 7 g dried yeast (in case you are working with new, fresh sourdough, if your dough is more stable and a few generations old, you might not need to add yeast any more at this stage).
- 100 g crushed walnut pieces
 |
| I now used this sourdough that I made 3 days in advance, from the bubbles we can see the dough is nice and active |
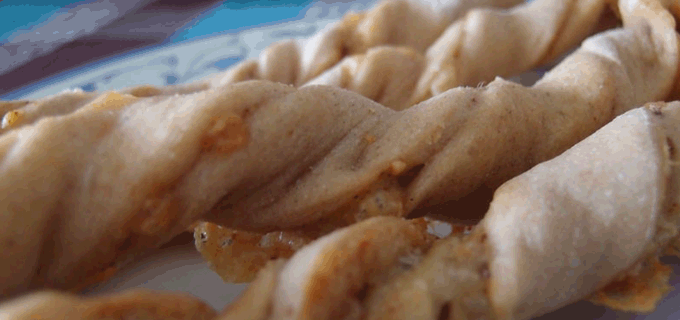
Now we take the dough out of the machine and start to knead it well through on the table. After kneading it well for about 3 minutes, we now have to knead some shape into the bread. This is easier said then done. But I found an awesome video that describes different kneading techniques for different breads and small bread. Check out this video over here on Youtube. I did see a lot more videos but this is the only one that describes a lot of different techniques in one simple and comprehensive video, so I choose that one. After we are now finished kneading the dough, we would put the bread in a fermentation basket for one final rest. This is because if we leave the bread lying around without a support, it will just slowly go apart and then you will end up with a round flat dough cake instead of a nice and round shaped bread.As I don't have such a basket and I don't think that I can find one easily, i just use a high bowl. I sprinkle the floor of the bowl with water so that the dough will not stick in it later when the final rest is over. Then I sprinkle water over my bread and put it in the basket for a final hour of fermentation.
 |
| After shaping the bread, following the instructions of the above video, the bread now is resting in the fermentation basket |
But as I also like some sesame corn on my bread, I actually first can sprinkle the bread with water and then I will roll the upper side of it in sesame seeds that will stick nicely to the bread
 |
| Bread resting in the fermentation basket after sesame seeds have been added on top |
1. We are going to spray the bread with water, make sure it is nice and glistening wet
2. Pour a cup of water in the preheated oven. Close the oven immediately after you poured the water inside so that the hot steam won't be able to escape
3. Add a cup of hot water with the bread in the oven
Then add the bread to the hot oven that is full of steam and bake the bread of about 15 minutes in these conditions. After the 15 minutes are over, open the oven, let the steam escape and reduce the temperature to 180°C. Bake the bread for another 45 minutes and then switch off the oven. Let the bread rest for ten more minutes. Then it's time to take it out. If you want to be sure that the bread is well baked through, knock with your knuckles on the bottom of the bread. If it sounds hollow, you can be sure that your bread is well baked through.
Here is my finished bread.If you look very closely, you can see that I had some minor issues with the precise temperatures of my oven (that's the punishment for buying a cheap brand Chinese oven I guess) but I will have to try again for a better optical result. The smell is mouth watering and the taste is perfect a bit sour and nice with the spices we added.
Last but not least, this is a rye based bread. Rye based breads are best consumed one day after they are baked. I know it is hard to wait with all those fantastic smells around you when the bread is fresh from the oven, but be patient, wait for one day and you will be rewarded with an awesome tasting bread indeed. .
No comments:
Post a Comment