 |
| Farmers loaf cut open and a fresh loaf next to it |
 |
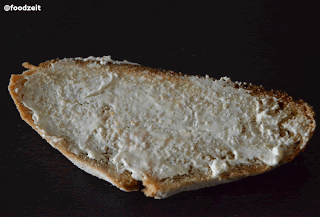
| Fresh cut slice of bread with cream cheese topping |
- 100 g rye flour
- 100 g water
- 10 g rye sourdough starter
- 100 g whole wheat flour
- 80 g water
- 1 g yeast
Main dough:
- Sourdough
- Sponge
- 35 g rye flour
- 430 g whole wheat flour
- 245 g water
- 13 g salt
- optional 6 g yeast
Mix everything well together; knead the dough for five minutes. Now let the dough rest for 30 minutes. We now form the bread. If you are not sure how to form / shape bread, please follow my link on "bread baking basics + know how". This is another one of my free formed bread and so, it has to rest in a form in order to not run flat on you. So normally you would put in a bread fermentation basket it you have one. This is a basket that bakers will let their breads ferment in for a while to get in form while fermenting. As I don't have a special basket for this, I am just taking a normal high bowl (I am still using the same on that I used when I made this bread) with a round bottom that gives my bread more or less the form that I desire for the bread. I flour the bowl well before I add the dough, this way later it won't stick to it. Now I add the formed dough bottom side up into the bowl. Let the bread ferment another 60 minutes.
Once the breads have been fermented, I drop them upside down from their bread baskets on my permanent Teflon baking foil on which I already sprinkled a bed of flour. Also sprinkle a layer of flour on top of the bread before putting in the oven. I also use my very sharp Japanese knife to cut a cross on the surface of my bread to have this kind of bread typical pattern. Normally there is a special knife that bakers take to do this, using a razor blade. But I don't have this knife, so my Santoku knife will have to do for now. Anyhow, back to the baking. The oven should be pre heated on 250°C. Pop the bread in the oven for about two minutes to solidify the shape. Now pour a cup of hot water in the oven (if you do not have this inbuilt steaming program in your oven at home) and also place a cup of water on the floor of the oven to give some additional steam later on. Quickly close the door so the hot steam will be caught within the oven. Having all that steam in the oven is, like mentioned many times before, extremely important for a scrumptious crust and a great consistency of the bread.
Bake the breads for 10 minutes like this until it reached the right brown color that you are looking for in a bread crust, then open up the door, let the steam out, lower the heat on 210°C and continue to bake the bread for another 40 - 50 minutes. Now switch off the heat, keep the door open and let the bread cool down slowly. I always spray a bit of water on top of the fresh loaf when it's still hot. It gives a nice and shiny surface the fresh baked crust. Voila, finished is your own artisan, self made, fresh bread.
AGAIN - a wonderful bread of mine on the yeastspotting webpage - happy and honoured like every time that happens...


The bread is just amazing, moist crumb, chewy outside and so flavourful! A very successful combination of rye and wholewheat, thank you!
ReplyDeleteGeorgia
Seriously, I love what you made of it. Your interpretation of my bread looks amazing and I love the idea of increasing the rye content and leaving the yeast away. Knowing now that my starter is good enough, I also will try and leave the yeast out in the future...
ReplyDeleteSure your starter is ready now! The same thing happened to me, I was afraid of the bread getting all flat and liquid so I kept adding yeast. But now I'm more confident with it. Hahaha, for us bakers starter is just like a baby, it grows up and you can then trust it and let it work on its own =) Thanks again for the recipe!
ReplyDeleteYou are so right, our sourdough is a living thing indeed and mine is just out of his infancy now after more then a year now. Thanks for the comment and good baking to you.
ReplyDelete